신규 서버를 만드는 업무를 하는 중에 JWT를 적용해야할 일이 생겼다.
JWT를 적용하기 전 Spring Security를 먼저 적용 후에 인증 방식을 바꾸는 방법을 택하기로 하였다.
1년차 때와 첫 SI 프로젝트에서 적용해본 적이 있음에도 불구하고 초반에 좀 허우적대느라 심리적 데드라인을 몹시 넘겼지만, 그래도 적용기를 올려보고자 한다.
우선, 스프링 시큐리티가 무엇인지 알아야겠다. 바로 공식 문서에서는 아래와 같이 설명하고 있다.
(참고: https://spring.io/projects/spring-security)
Spring Security is a powerful and highly customizable authentication and access-control framework.
한 마디로 정의하면, 'Spring Security는 강력하고 사용자 정의가 가능한 인증 및 액세스 제어 프레임워크' 라는 설명이다.
사용자 정의? 뭔지 모르겠지만 조금 더 알아보자.
Spring Security is a framework that focuses on providing both authentication and authorization to Java applications.
Spring Security는 'Java 애플리케이션에 인증 및 권한 부여를 모두 제공하는 데 중점을 둔 프레임워크다' 라고 한다.
특징은 다음과 같다.
- Extensible support for both Authentication and Authorization (확장 가능한 인증과 권한을 위한 지원)
- Protection against attacks like session fixation, clickjacking, cross site request forgery, etc (공격으로부터의 보호)
- Servlet API integration
- Optional integration with Spring Web MVC
샘플을 만들어보자. 다른 것은 건드리지 말고 Gradle로 다음과 같이 설정해보았다.
plugins {
	id 'java'
	id 'org.springframework.boot' version '3.0.0'
	id 'io.spring.dependency-management' version '1.1.0'
}

group = 'com.demo'
version = '0.0.1-SNAPSHOT'
sourceCompatibility = '17'

repositories {
	mavenCentral()
}

dependencies {
	implementation 'org.springframework.boot:spring-boot-starter-security'
	implementation 'org.springframework.boot:spring-boot-starter-web'
	testImplementation 'org.springframework.boot:spring-boot-starter-test'
	testImplementation 'org.springframework.security:spring-security-test'
}

tasks.named('test') {
	useJUnitPlatform()
}
그대로 Run을 수행 후 localhost:8080으로 접속해보자.

이렇게 로그인 화면을 확인할 수 있다. 그런데, 우리는 아이디와 비밀번호를 설정한 적이 없다. 그럼 어떻게 로그인을 할까?
물론, 구글에 검색해서 쉽게 찾을 수 있지만 그래도 직접 찾아보면 소소한 성취감을 느낄 수 있을 것이다! (아마...?)
콘솔 창을 보도록 하자.
2022-12-21T16:30:20.919+09:00  INFO 9216 --- [           main] o.apache.catalina.core.StandardService   : Starting service [Tomcat]
2022-12-21T16:30:20.919+09:00  INFO 9216 --- [           main] o.apache.catalina.core.StandardEngine    : Starting Servlet engine: [Apache Tomcat/10.1.1]
2022-12-21T16:30:21.020+09:00  INFO 9216 --- [           main] o.a.c.c.C.[Tomcat].[localhost].[/]       : Initializing Spring embedded WebApplicationContext
2022-12-21T16:30:21.023+09:00  INFO 9216 --- [           main] w.s.c.ServletWebServerApplicationContext : Root WebApplicationContext: initialization completed in 613 ms
2022-12-21T16:30:21.467+09:00  WARN 9216 --- [           main] .s.s.UserDetailsServiceAutoConfiguration :

Using generated security password: e9dd75db-40ae-46ea-b9d2-9076ad97e03d

This generated password is for development use only. Your security configuration must be updated before running your application in production.

2022-12-21T16:30:21.578+09:00  INFO 9216 --- [           main] o.s.s.web.DefaultSecurityFilterChain     : Will secure any request with [org.springframework.security.web.session.DisableEncodeUrlFilter@493b01ef, org.springframework.security.web.context.request.async.WebAsyncManagerIntegrationFilter@36c2d629, org.springframework.security.web.context.SecurityContextHolderFilter@1f1cddf3, org.springframework.security.web.header.HeaderWriterFilter@56dd6efa, org.springframework.security.web.csrf.CsrfFilter@12b5736c, org.springframework.security.web.authentication.logout.LogoutFilter@72bdd7c7, org.springframework.security.web.authentication.UsernamePasswordAuthenticationFilter@79d82f66, org.springframework.security.web.authentication.ui.DefaultLoginPageGeneratingFilter@21a9a705, org.springframework.security.web.authentication.ui.DefaultLogoutPageGeneratingFilter@55fee662, org.springframework.security.web.authentication.www.BasicAuthenticationFilter@630390b9, org.springframework.security.web.savedrequest.RequestCacheAwareFilter@75b6dd5b, org.springframework.security.web.servletapi.SecurityContextHolderAwareRequestFilter@4d0e54e0, org.springframework.security.web.authentication.AnonymousAuthenticationFilter@54089484, org.springframework.security.web.access.ExceptionTranslationFilter@267cde2e, org.springframework.security.web.access.intercept.AuthorizationFilter@6c479fdf]
2022-12-21T16:30:21.649+09:00  INFO 9216 --- [           main] o.s.b.w.embedded.tomcat.TomcatWebServer  : Tomcat started on port(s): 8080 (http) with context path ''
친절하게 password를 출력해주고 있다. (아이디는 왜 안 알...?)
password가 UserDetailsServiceAutoConfiguration 뒤에 바로 나오니 수상하다. 수상하면 들어가보면 된다.
// UserDetailsServiceAutoConfiguration.java

package org.springframework.boot.autoconfigure.security.servlet;
...
public class UserDetailsServiceAutoConfiguration {
...
    @Bean
    public InMemoryUserDetailsManager inMemoryUserDetailsManager(SecurityProperties properties,
            ObjectProvider<PasswordEncoder> passwordEncoder) {
        SecurityProperties.User user = properties.getUser();
        List<String> roles = user.getRoles();
        return new InMemoryUserDetailsManager(
                User.withUsername(user.getName()).password(getOrDeducePassword(user, passwordEncoder.getIfAvailable()))
                        .roles(StringUtils.toStringArray(roles)).build());
    }

    private String getOrDeducePassword(SecurityProperties.User user, PasswordEncoder encoder) {
        String password = user.getPassword();
        if (user.isPasswordGenerated()) {
            logger.warn(String.format(
                    "%n%nUsing generated security password: %s%n%nThis generated password is for development use only. "
                            + "Your security configuration must be updated before running your application in "
                            + "production.%n",
                    user.getPassword()));
        }
        if (encoder != null || PASSWORD_ALGORITHM_PATTERN.matcher(password).matches()) {
            return password;
        }
        return NOOP_PASSWORD_PREFIX + password;
    }
}
다음으로 수상한 부분이 바로 눈에 띌 것이다. SecurityProperties.User 클래스로 가보자.
// SecurityProperties.java

package org.springframework.boot.autoconfigure.security;
...
@ConfigurationProperties(prefix = "spring.security")
public class SecurityProperties {
...
	public static class User {

		/**
		 * Default user name.
		 */
		private String name = "user";

		/**
		 * Password for the default user name.
		 */
		private String password = UUID.randomUUID().toString();

		/**
		 * Granted roles for the default user name.
		 */
		private List<String> roles = new ArrayList<>();

		private boolean passwordGenerated = true;

		public String getName() {
			return this.name;
		}

		public void setName(String name) {
			this.name = name;
		}

		public String getPassword() {
			return this.password;
		}

		public void setPassword(String password) {
			if (!StringUtils.hasLength(password)) {
				return;
			}
			this.passwordGenerated = false;
			this.password = password;
		}

		public List<String> getRoles() {
			return this.roles;
		}

		public void setRoles(List<String> roles) {
			this.roles = new ArrayList<>(roles);
		}

		public boolean isPasswordGenerated() {
			return this.passwordGenerated;
		}

	}

}
기본적으로 수행할 때 마다 아이디는 user, 비밀번호는 임의의 UUID 로 초기화해주고 있다. 사용자가 알 수 있는 값이 아니니 password는 UUID만 콘솔에 출력해주고 있었던 것이 아닐까 한다.
자, 이제 로그인 정보를 알았으니 실제 로그인을 해보도록 하자.
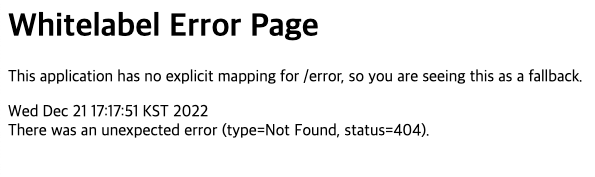
404 에러이기 때문에 매핑된 Path가 없어서 나타나는 페이지이니 걱정할 필요 없다.
글을 쓰다가 공식 문서를 자세히 들여다보게 됐다. 무조건 찾거나 어설프게 하기 전에 공식 문서를 봐야하는 이유!
이미 공식 문서에서는 당연하게도 스프링 부트 자동 구성에 대해 설명하고 있다.
(참고: https://docs.spring.io/spring-security/reference/servlet/getting-started.html)
Hello Spring Security :: Spring Security
You can now run the Spring Boot application by using the Maven Plugin’s run goal. The following example shows how to do so (and the beginning of the output from doing so): Running Spring Boot Application $ ./mvn spring-boot:run ... INFO 23689 --- [ resta
docs.spring.io
Spring Boot automatically:
- Enables Spring Security’s default configuration, which creates a servlet Filter as a bean named springSecurityFilterChain. This bean is responsible for all the security (protecting the application URLs, validating submitted username and passwords, redirecting to the login form, and so on) within your application.
- Creates a UserDetailsService bean with a username of user and a randomly generated password that is logged to the console.
- Registers the Filter with a bean named springSecurityFilterChain with the Servlet container for every request.
뭐... 읽기 어렵다고 해서 공식 문서를 멀리할 필요는 없지 않을까...?
서두에 아래와 같이 언급을 했었다.
'Spring Security는 강력하고 사용자 정의가 가능한 인증 및 액세스 제어 프레임워크' 라는 설명이다.
사용자 정의를 하기 위해서는 로그인이 어떻게 수행되는지를 알아야 할 것 같다. 다음 번엔 로그인이 수행되는 과정에 대해 알아보도록 하자.
E.O.D
'개발유랑기 > Spring' 카테고리의 다른 글
| 프로젝트 생성 시 Group, Artifact 란? (0) | 2022.11.18 |
|---|
